Introduction
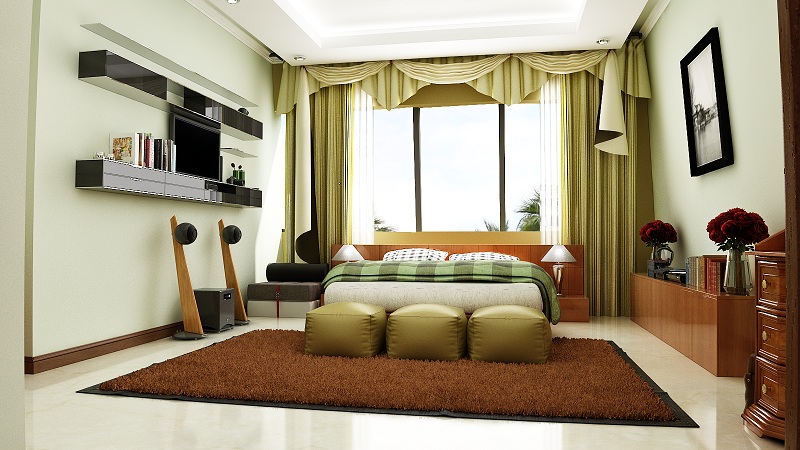
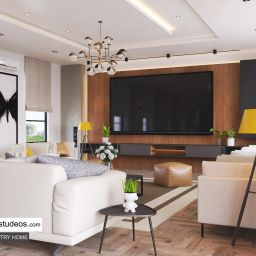
The beginning of this project was the moment when we decided to make a warm space with a perfect blend of contemporary architecture and antique accents.

It started with a rough sketch of the space required from a luxury apartment. The aim was to design and visualize a homely space without sparing simplistic details. Views were also important to buttress the cozy atmosphere.
Design software used was Autodesk 3Dsmax and the render engine was Chaos group’s Vray
Click the images to enlarge (opens a new browser tab)
The Modelling
The major modelling technique used was box modelling. The skeletal frame of the bedroom is concealed by the glazing from the exterior. The slant wall was a feature in the entire building.


The loft tool was used to make the skirting and cornice trims from profiles swept along paths. Vertices were further welded to complete the difficult ends.


Scene lighting & Camera settings
The basic types of lighting used were vray dome and vray sun lights in addition to vray cameras tweaked and test-rendered to give a warm and ambient solution. Vray planes were placed in the ceiling recesses to accentuate incident lighting. A mild sphere placed in the centre of the room was used to calculate the vray camera’s white balance. See the camera and light settings below


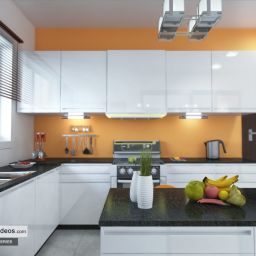
Scene population & Material application
The scene was further populated with interior furnishing. Materials, textures and colours were toned to conform with the desired mood in response to the chosen lighting scheme.


Final image render-time: 45mins
Credits:
We wish to thank the following people for being part of this project
Anifowose Hassan (Geometry modelling), Olamidun Akinde (Scene composition), Mauricio Amado (Conceptual)
Join the discussion here https://www.facebook.com/chronosstudeos


great piece…inspiring#
To get more shadows from the ceiling corners sometimes you will have to reduse the shadow gap. Nice work…!
Wow! Really nice job guys. Keep ‘em coming. Way to go. Mos’def’ly ENLIGHTENING!
thanks Kolu.. we’ll be glad to see your works too.. if they are on facebook don’t forget to tag us.. or you can mail us a location to your works [email protected] thank you
Lovely work as usual,a CLASSIC to remember.Need to mention you forgot to show how you applied the background behind the window that has vegetation,houses and cars whether it is attached to window or done in Photoshop other than the HDRI that has been used in the VRay Environment slot to light up the scene,cheers & a big THANKS for this post very ENLIGHTENING!!!
You actually make it seem so easy with your presentation. I find 3D rendering to be actually something that I think I can master. I am looking forward for your next post, I will try to get the hang of it! Thank you for the post..
As a Newbie, I am always exploring online for articles that can aid me. Thank you
Hi Fellas!
i would like to know the settings for the primary and secondary bounces and the parameters used for each.. also resolution of the final image.
Nice work Brothers
Dear max both primary (irradiance map) and secondary bounces (light cache) were left as default. 1.0 each
Well arranged bedroom with nice furniture to fit…3Dmax really good.
NICE JOB
you guys make it seem easy keep it up guys
job well done,pls we’ll need u to enlighten us how to use revit to acheive these same great result
Hello bola, we will work on a revit post very soon. please be on the lookout.. cheers