In our previous post, we revealed how the Parametric Modelling for Allianz Arena was achieved by Hassan Anifowose, here we will be showing you the details of how he implemented the Dynamo Programming Process. Stay tuned because you might learn a few things.
The preparation
01. Declaring the intention
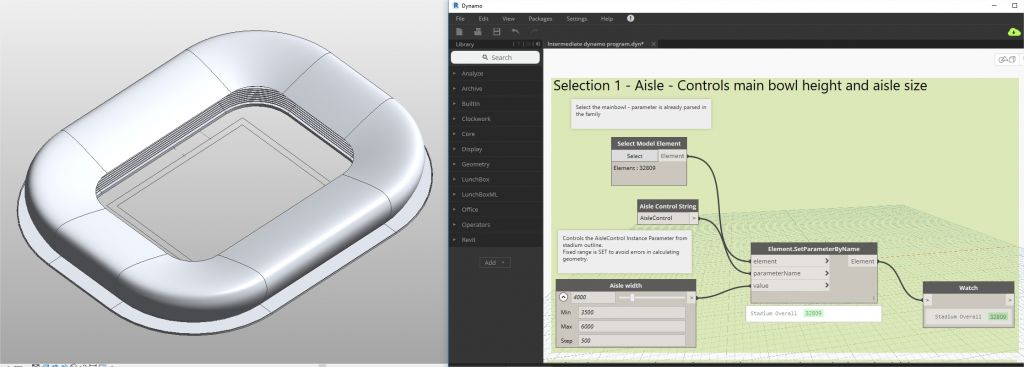
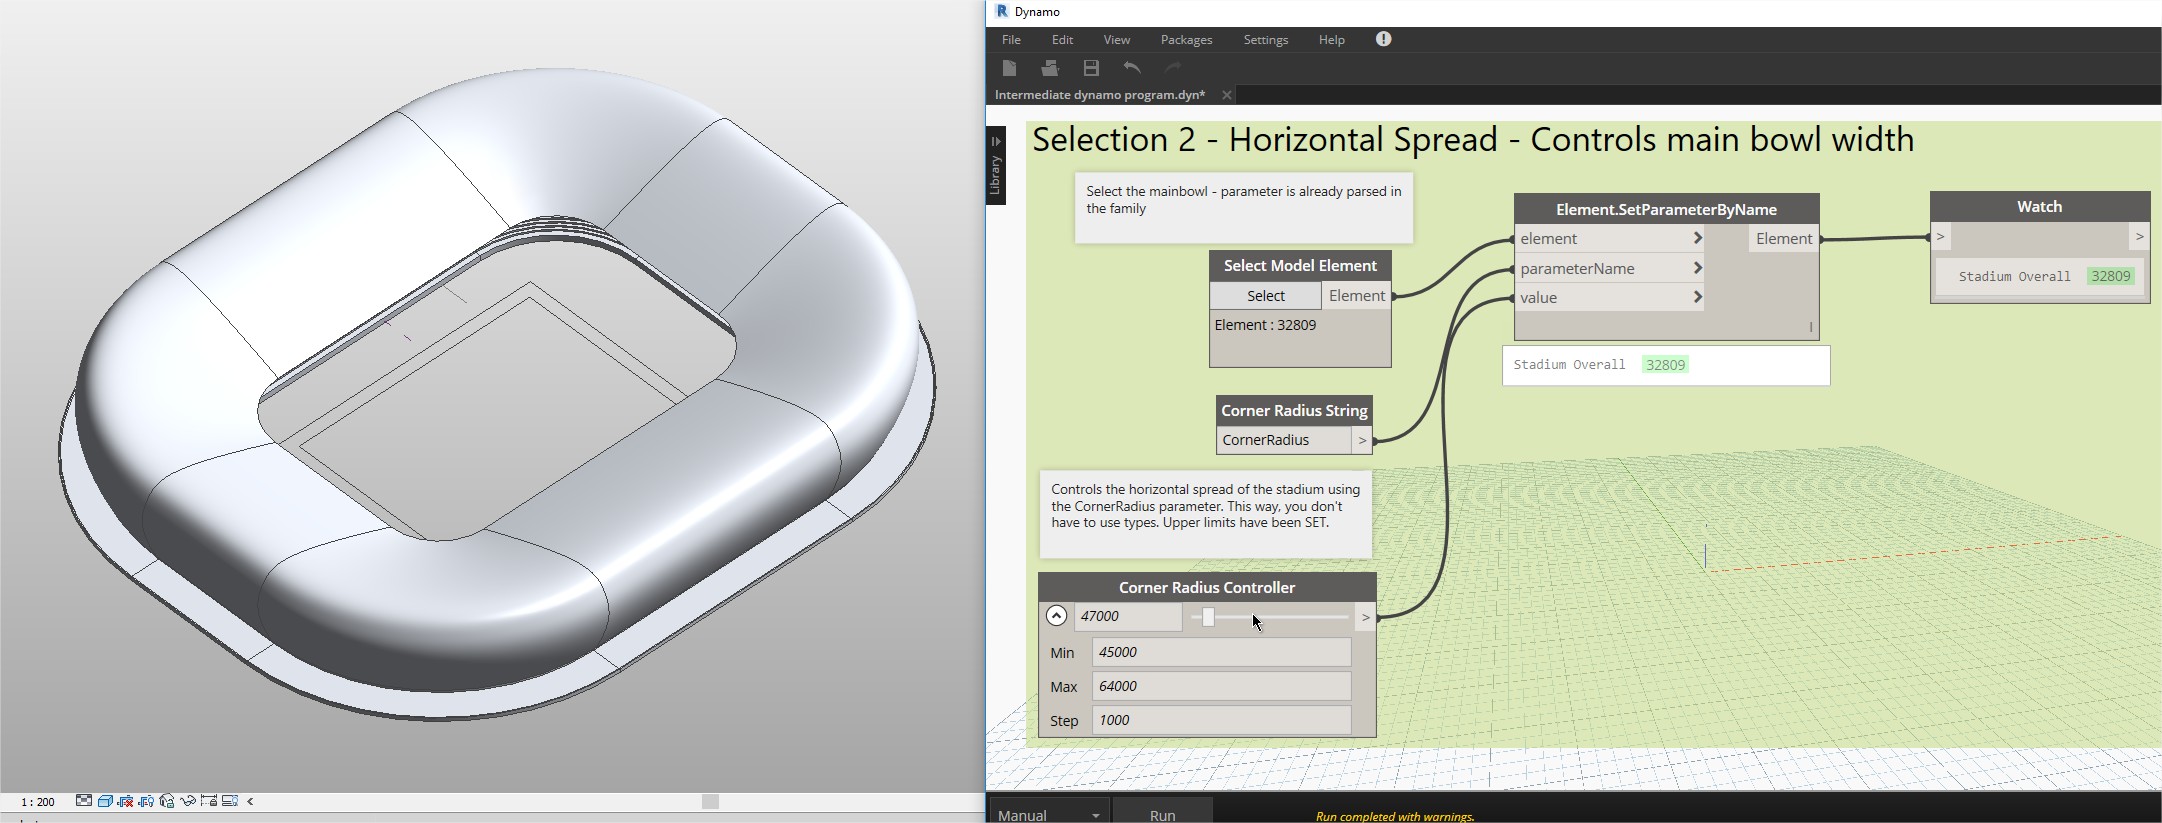
Using dynamo, the width and height would be controlled by sliders instead of manually inserting numbers in the parameters section so anyone could adjust the size of the stadium to their preferences. However, the limits were set to prevent geometric computational errors.
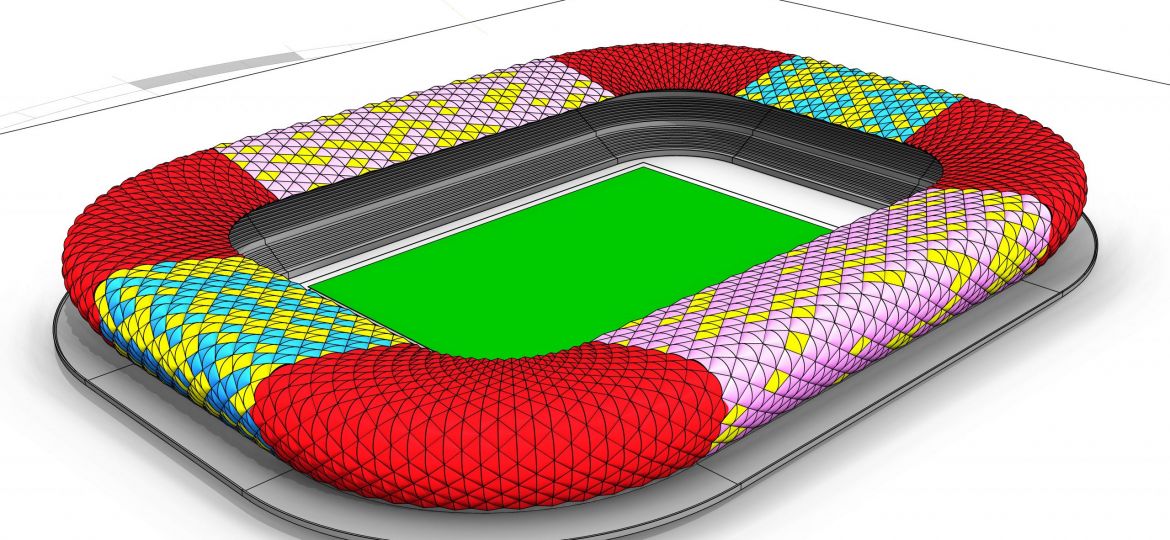
The parametric design and modeling were designed to reflect the intention of the original designer – to display different light patterns at different times depending on the football teams playing. These light patterns were programmed to change all the panels to the same colour or randomize additional swatches.
This was done with a slight modification that enabled the stadium panels to randomly change colours, through specific colour swatches occasionally reflecting in different positions on defined panels.
The panel was also set to respond to the time of the day, and adjust colours according to the level of sun exposure the surfaces would have. The aim was to allow analysts to determine which surfaces were most impacted by heat, or the panels receiving most sunlight.
02. Important Setup
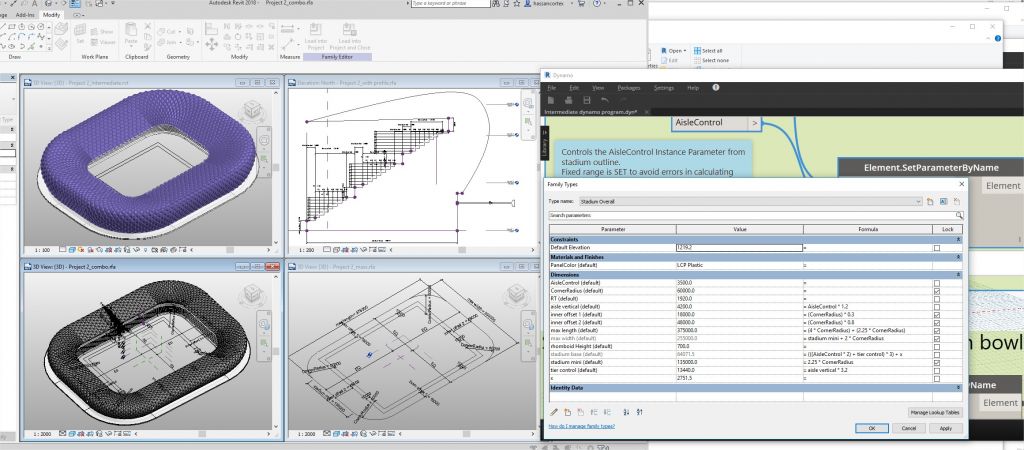
The initial setup involved recreating the stadium profile; optimizing the bent surface to generate better panels so that the geometry could be efficiently managed and dynamo programs would execute faster.
The Process
01. First Program
The first set of codes were created to fit the stadium width and height based on preset parameters shown above and implemented in the programs in the image below. The codes are run and tested to avoid geometric errors and ensure speedy execution – very important.
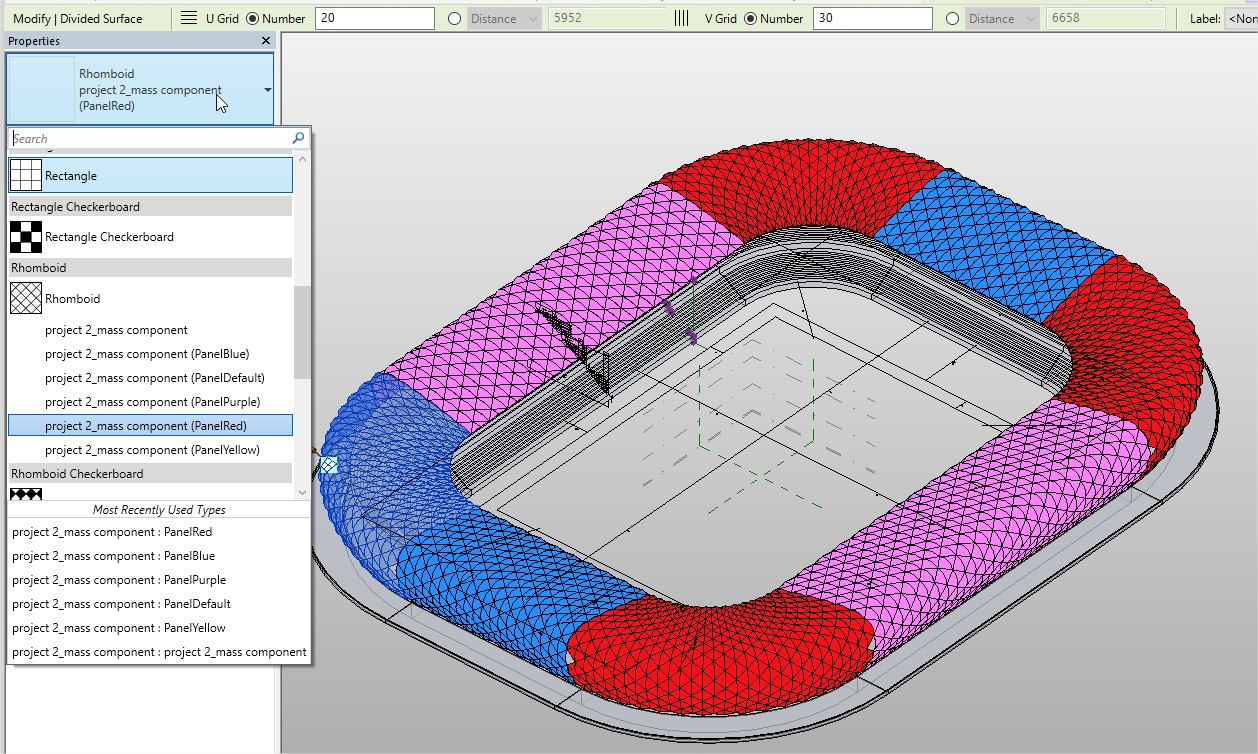
02. Creating Colored Panels
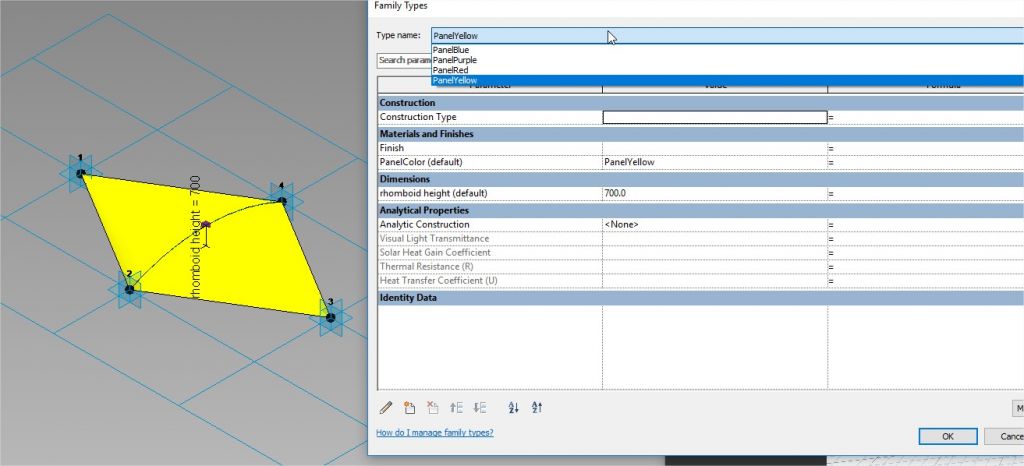
To create the different types of panels based on their colours, different types of panel colours were made (although the dark grey was retained with the name “defaultpanel”. This was to allow progressive testing). In total, 4 new panels and a default panel were created. (Note: You can edit as many colours as you want). Next, the different panels created were loaded into the project and applied to the surfaces.
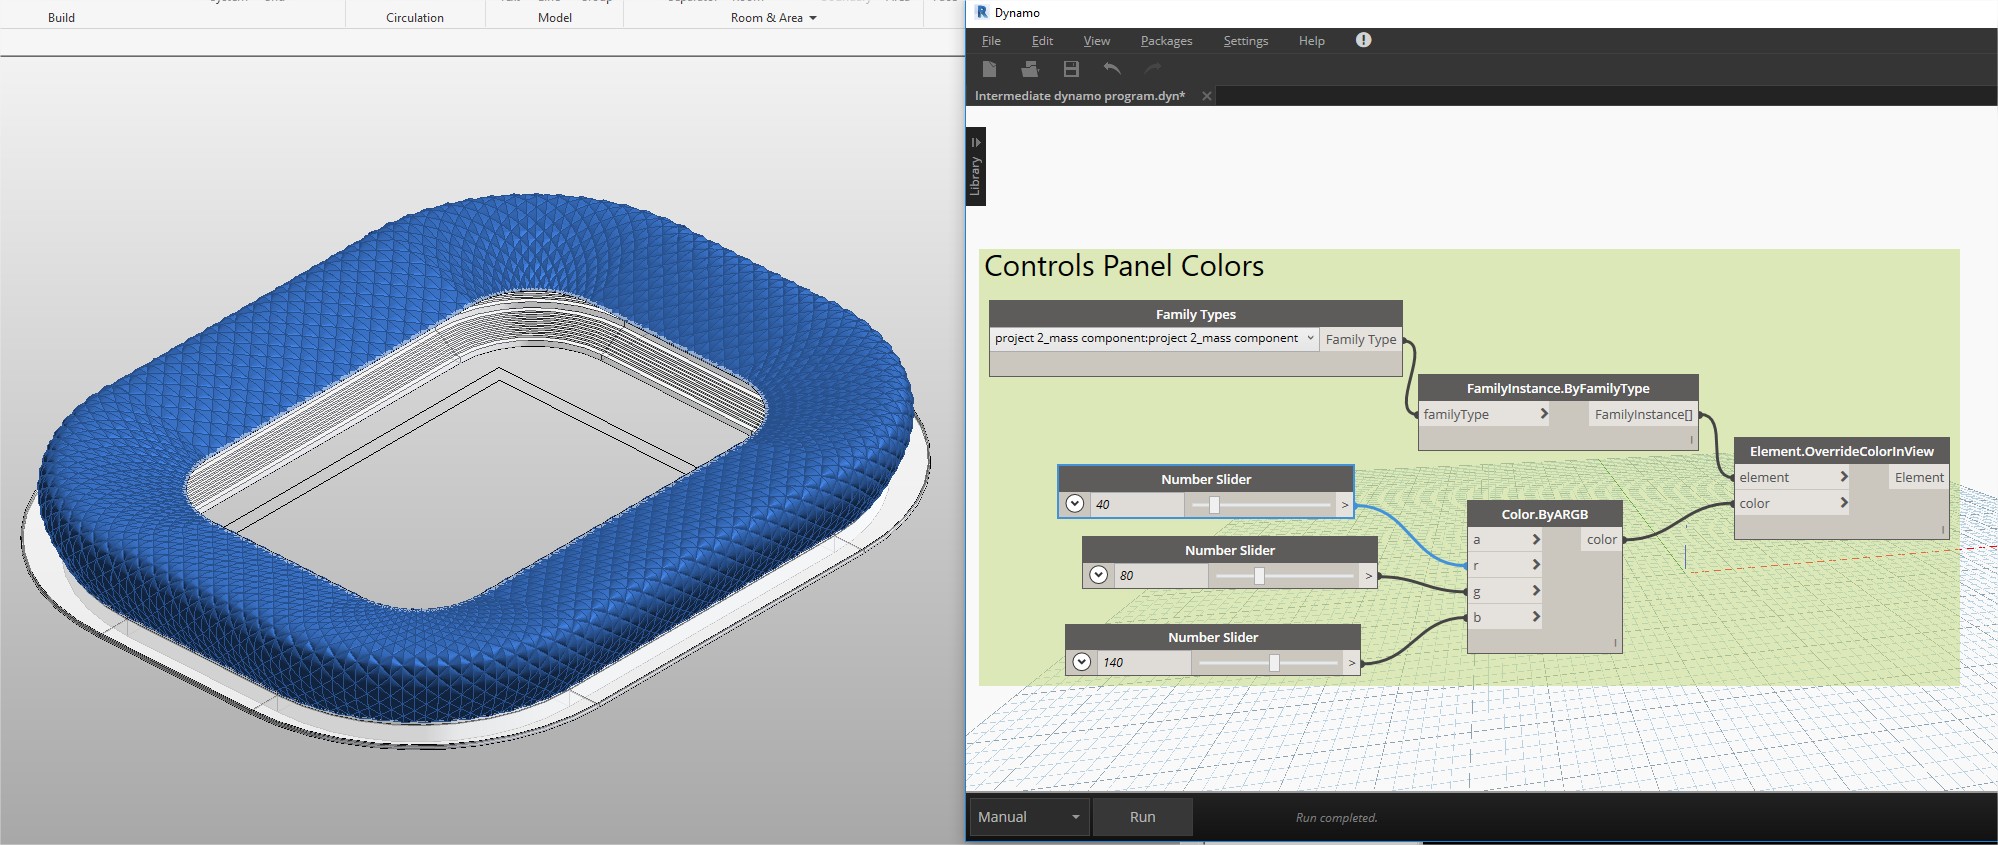
03. Creating Static Panel Colour Program
Sequel to creating and loading the panels, the dynamo program was created to consistently adjust the colour of the overall panels. This will enable panel modifications without having to edit the panel types. Colours can be changed based on their RGB values.

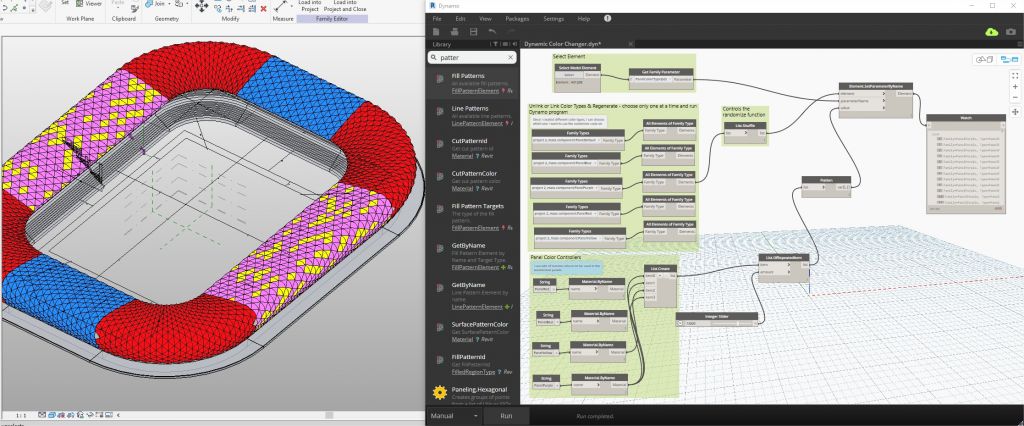
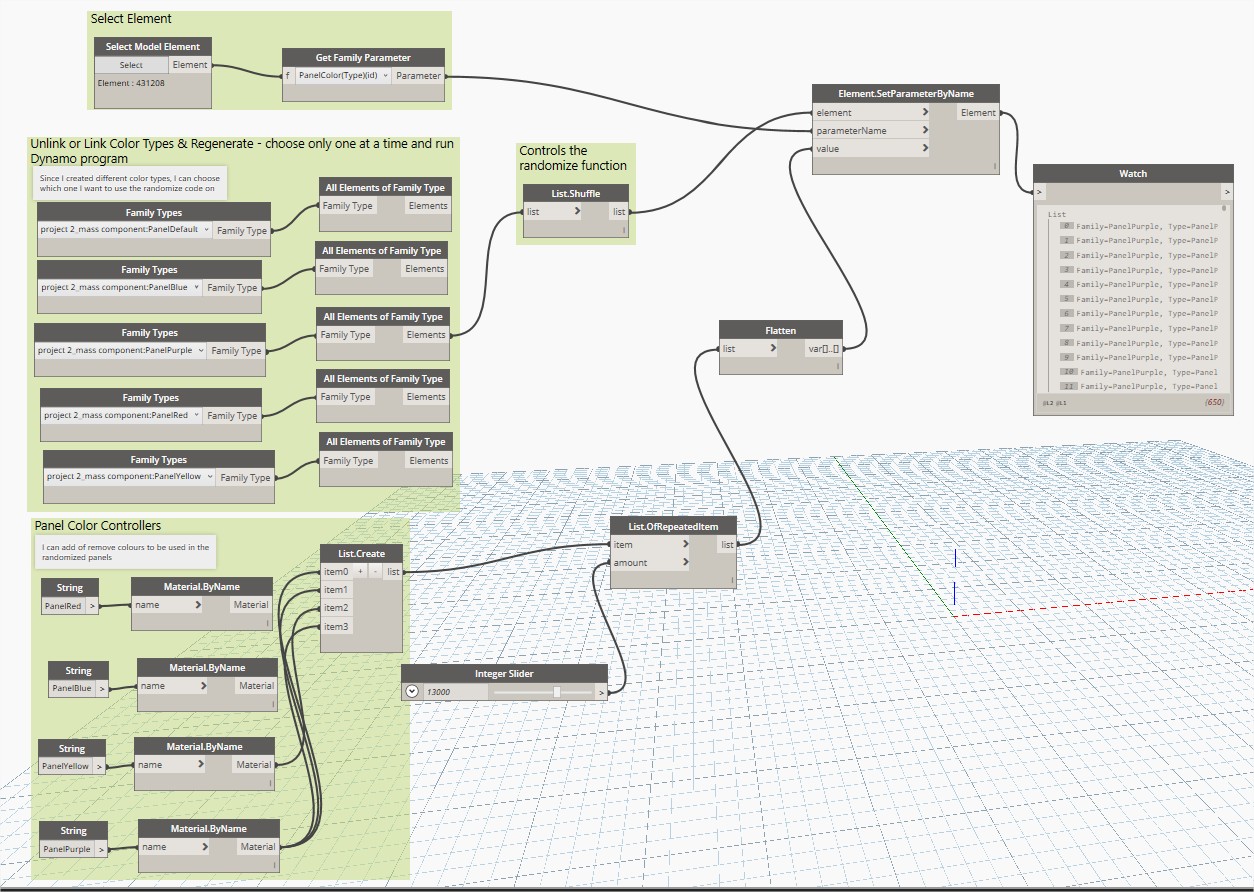
04. Creating the Dynamic Panel Color Program
A program was created to allow anyone to input the colours according to the panel type, after which, they could change various segments of the stadium to show this and control random positions for the coloured panels using a randomizer dynamo node. This was done to simulate a real scenario of different teams playing football as the stadium colours changed to their country flag colours and so on.
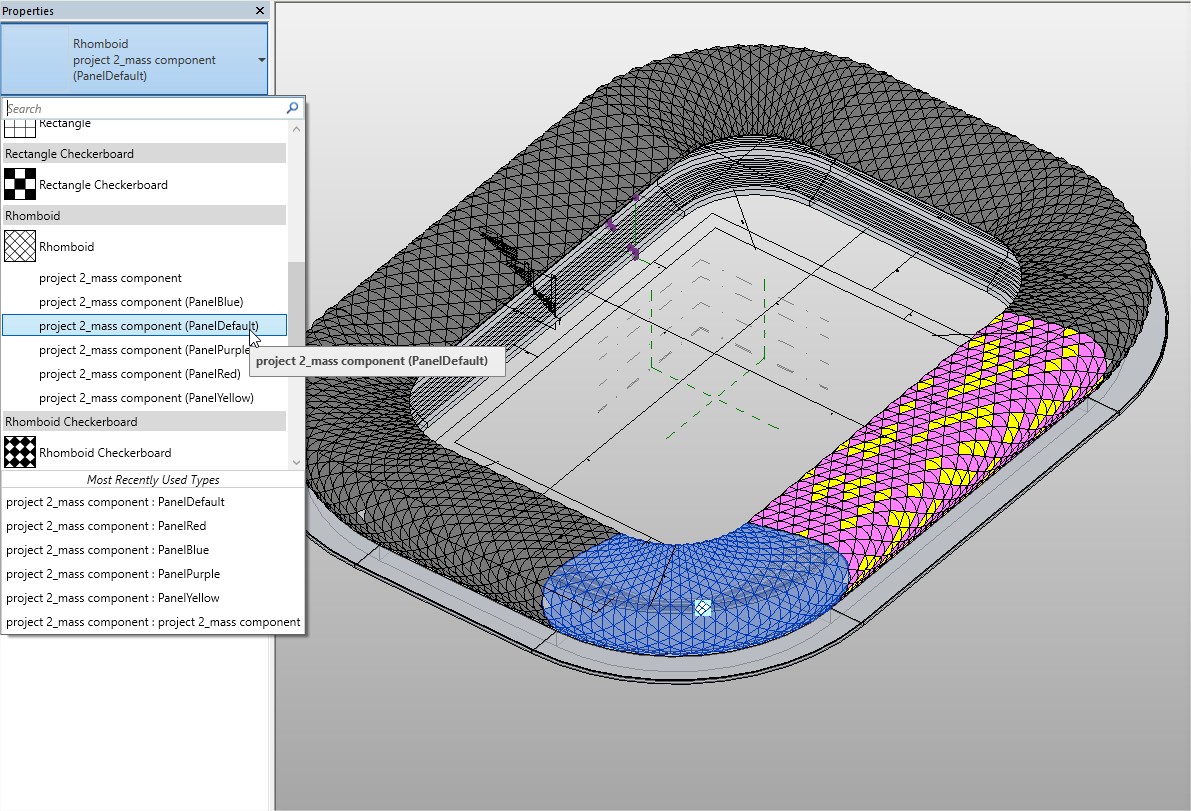 Step – select any of the segments and you can define what uniform colour panel type to make it.
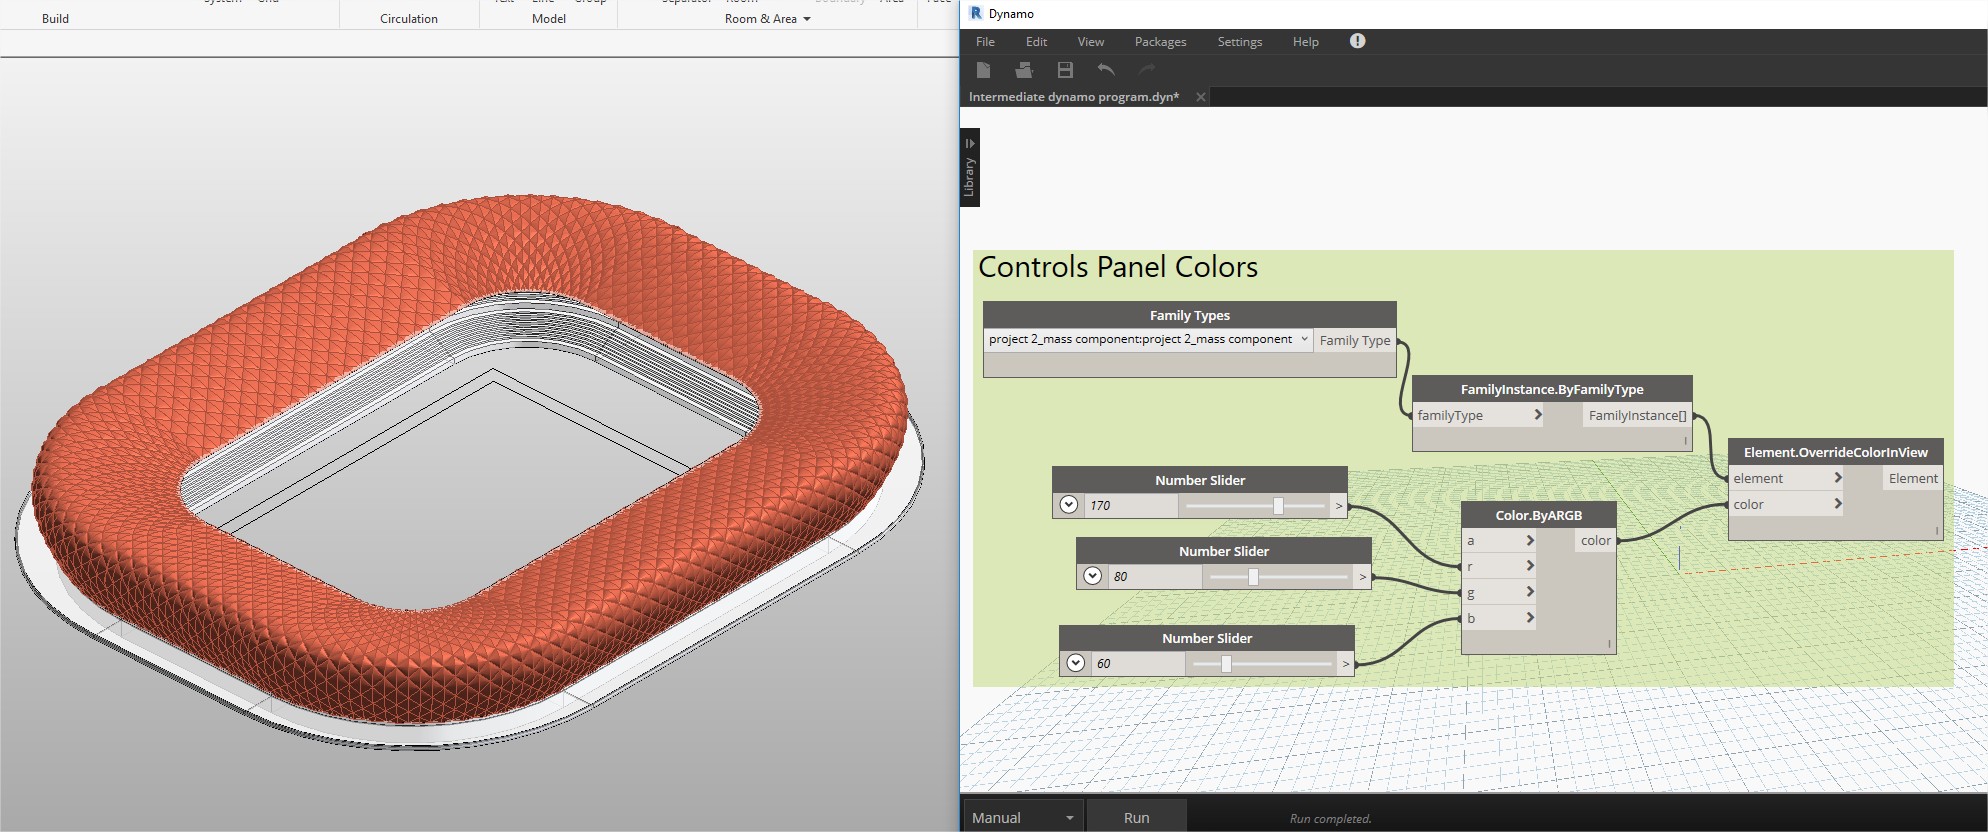
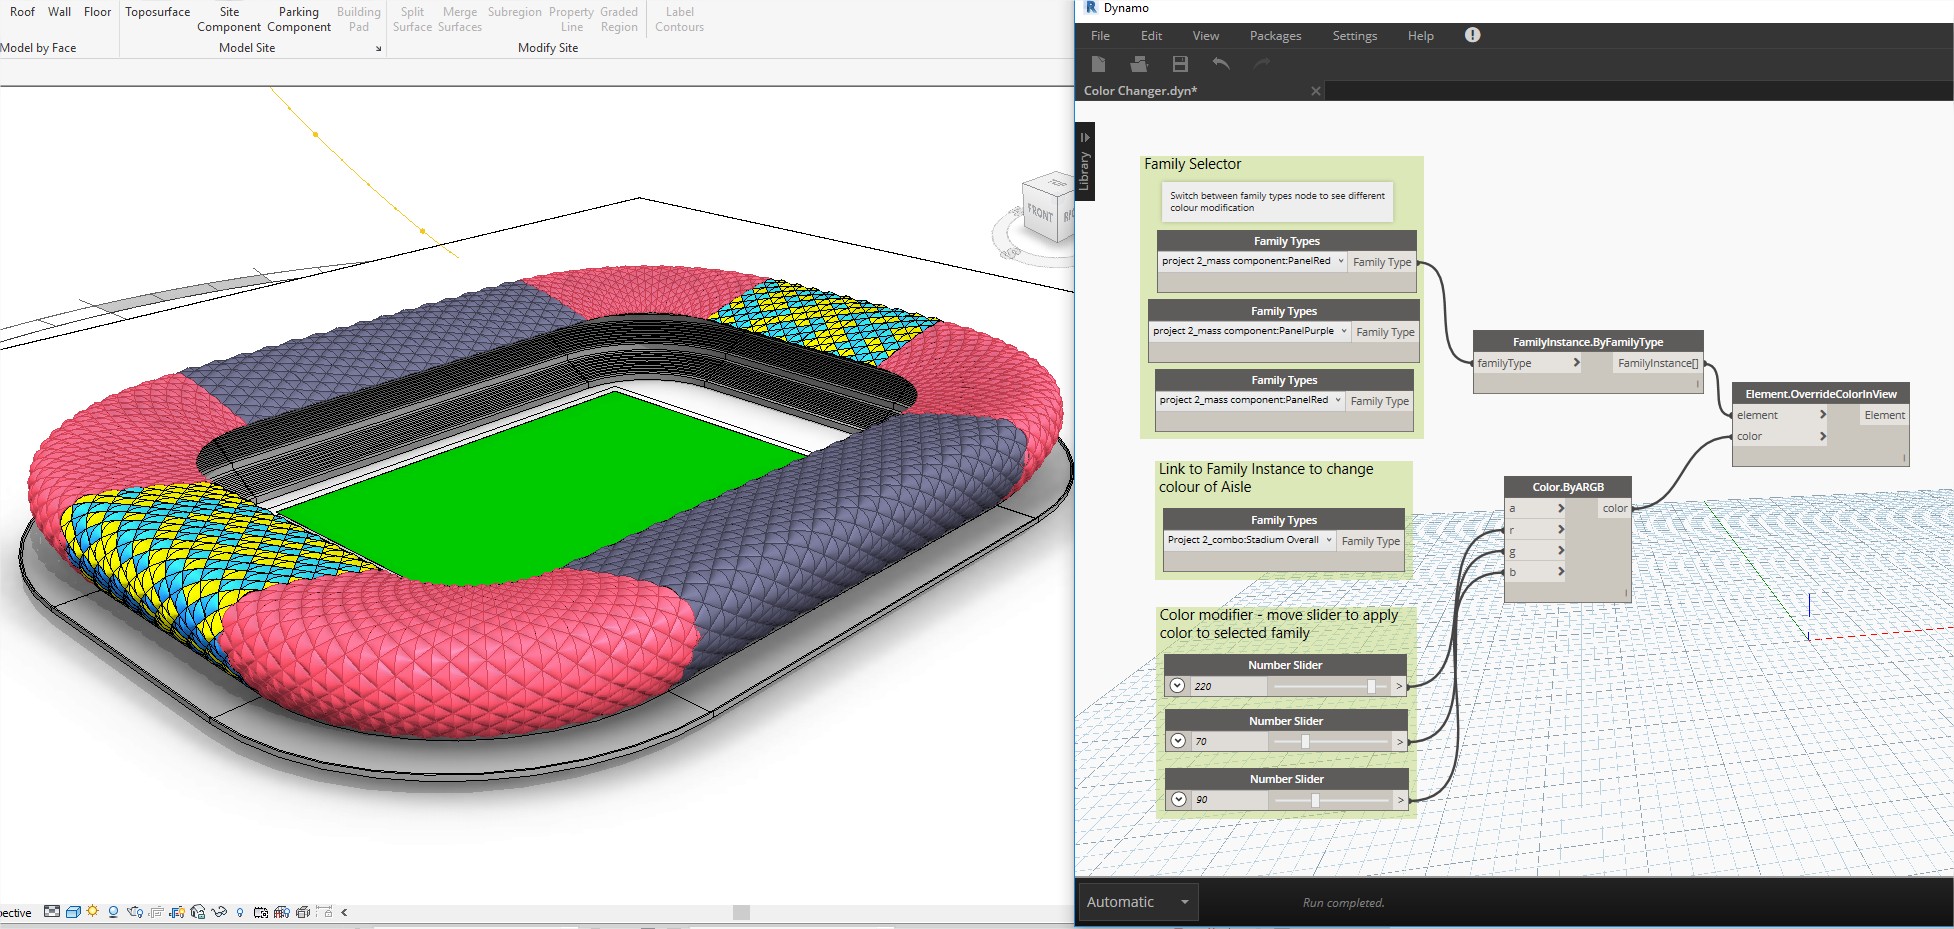
05. More Dynamic Colour Options
With the use of ColorByARGB Node, more dynamo programs were created to change the colours of the segments beyond the basic preset types of panels.

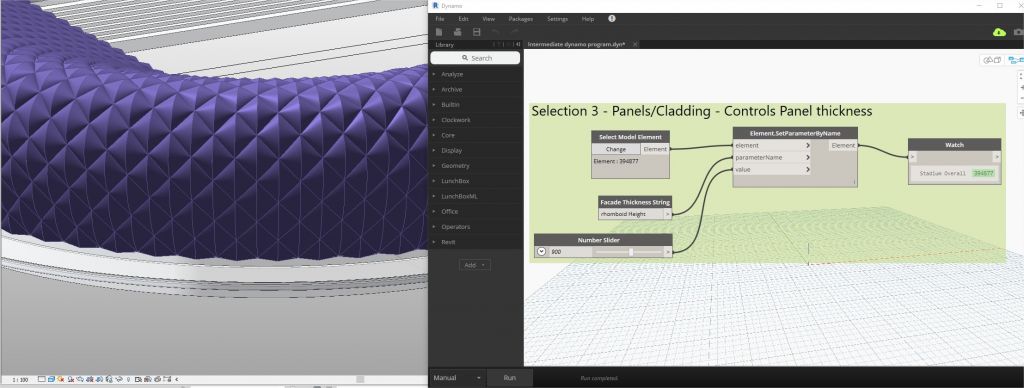
06. Changing Panel Heights
A program was also created to adjust the panel heights with a number slider so the user does not have to edit the panel each time. A limit was set for the maximum height the panels could go so they remain in proportion.
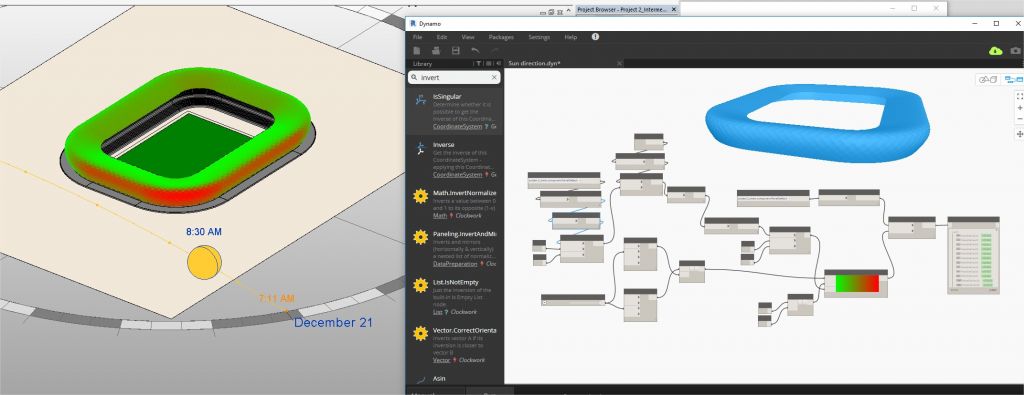
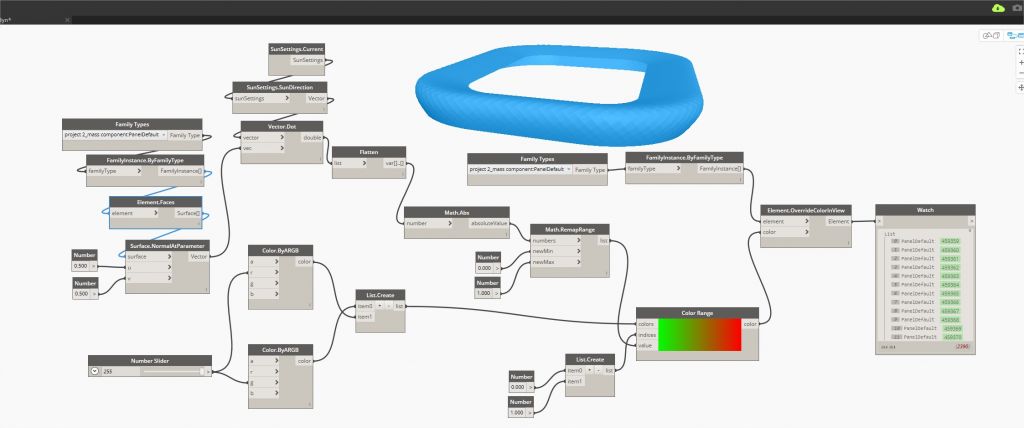
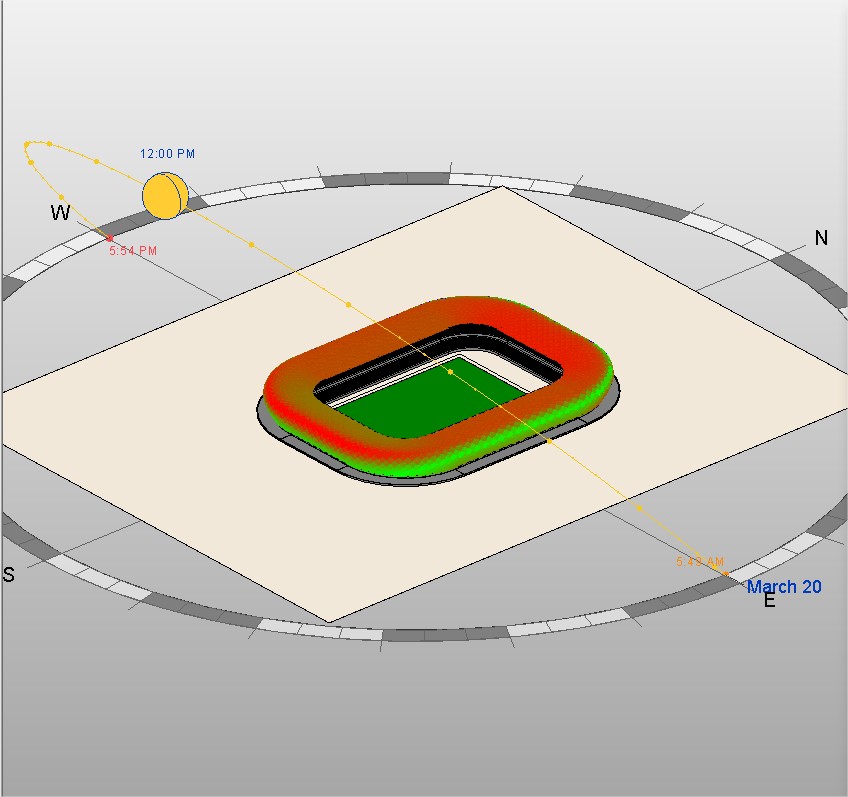
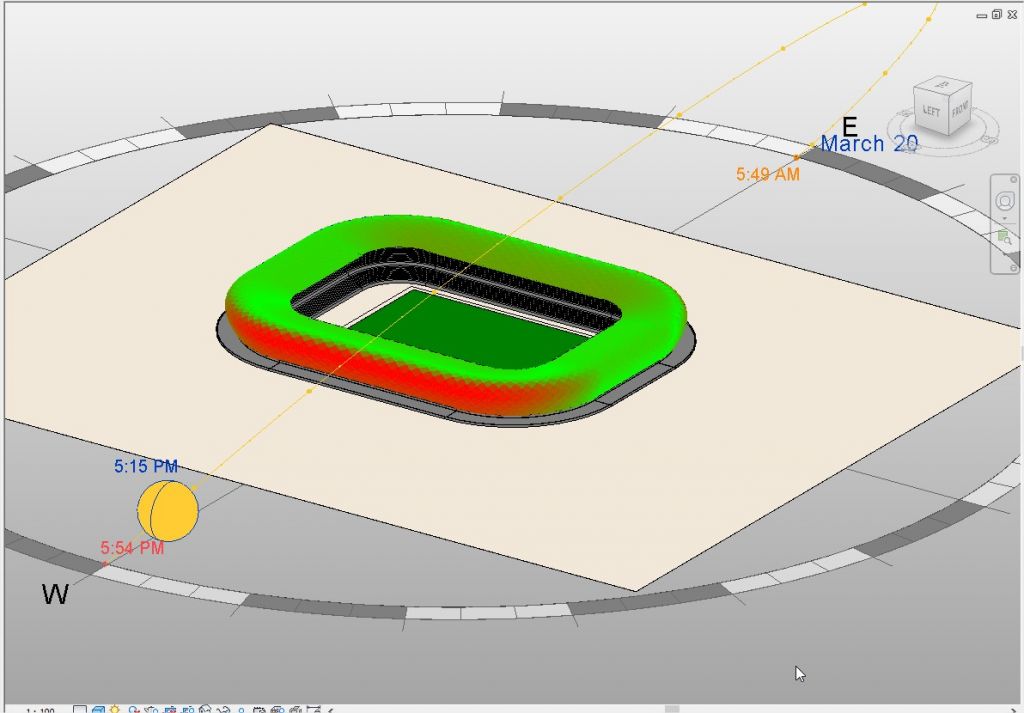
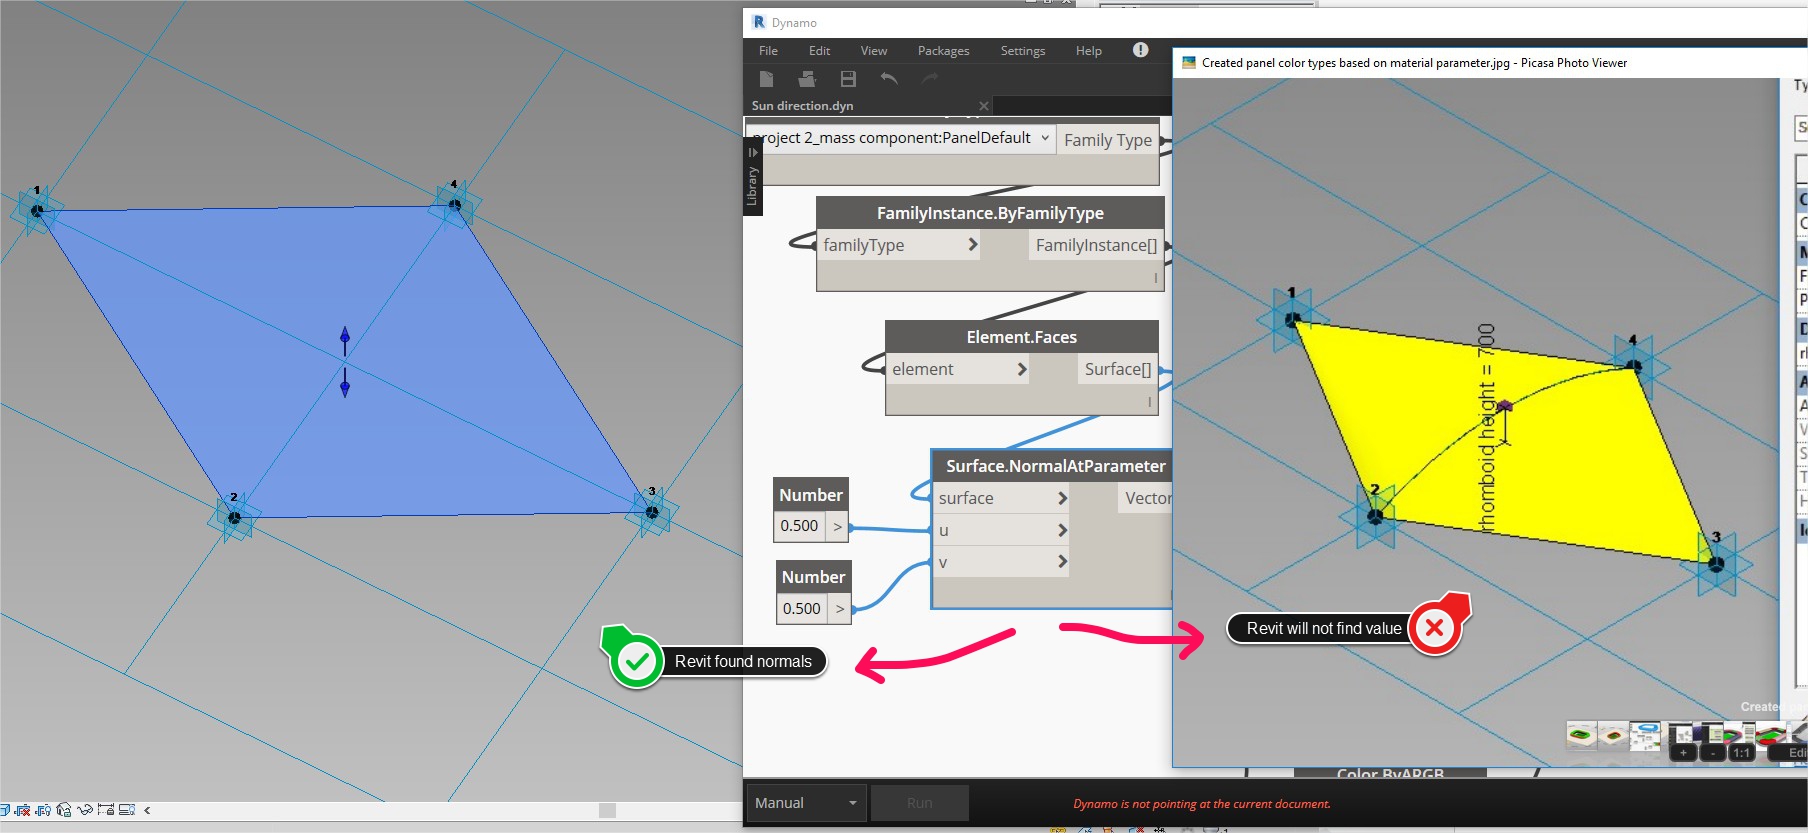
07. Panel Orientation to Sun Position
Another program was created to show the surface of the dome receiving the highest and lowest amount of sunshine at a time. This would enable further study of panel behaviour during different times of the year. This program was effected using the sun settings in Revit. Note: the program will not run in the camera view.
The Limitations
During the creation of these codes, it was discovered that there was difficulty in running all the programs by a single file. Therefore, creating separate folders for some of the unique features you want was the way forward. This way, it was easy to manage programs and outcomes.
Another limitation was the inability of the Surface Normal at Parameter to execute when the panel used a “Revit Curve”. This was resolved by flattening the panel component so it could be processed. A good point to note by future users as it will save them a lot of time during creating similar projects.
 Overall, the task was a great experience for Hassan Anifowose, watch how the creation video: